
Introduction: A Smarter Way to Inspect Your Home
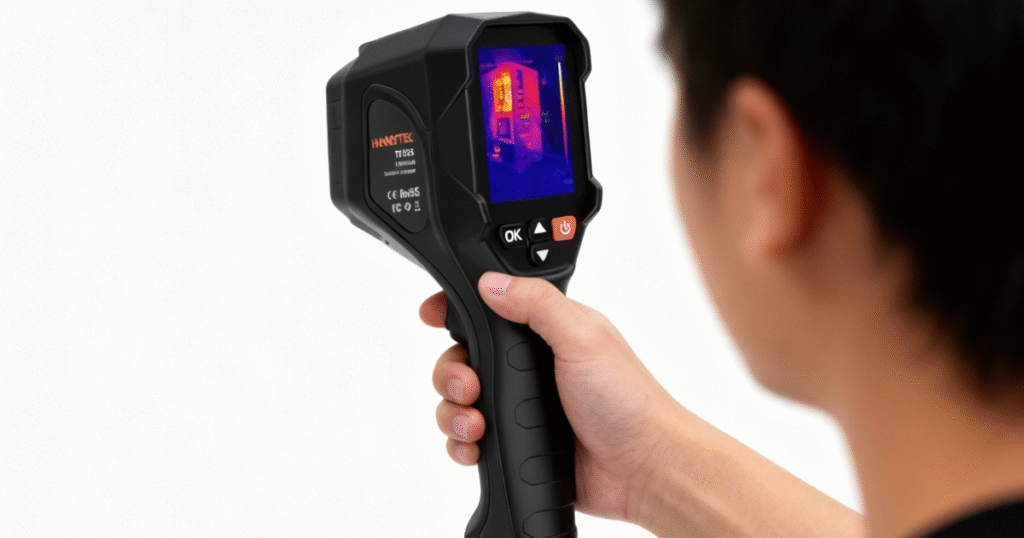
Modern home inspection relies not only on experience and intuition but also on advanced technology. One of the most effective tools for building diagnostics today is the infrared thermal imaging camera.
By visualizing temperature differences across walls, ceilings, and floors, thermal imagers reveal problems invisible to the naked eye — such as water leaks, missing insulation, hidden voids, or poor air sealing.
Whether used by professional home inspectors, contractors, or DIY homeowners, thermal cameras provide non-destructive, fast, and accurate results that save both time and money.
Brands like Honeytek, a professional electronic measurement tool manufacturer, offer high-quality and affordable infrared imagers that make advanced building diagnostics accessible to everyone.
What Is an Infrared Thermal Imaging Camera?
An infrared thermal imaging camera (also called a thermal imager) detects the infrared radiation naturally emitted by all objects. It converts temperature variations into color-coded images — warm areas appear in red or yellow, while cooler zones appear blue or purple.
In home inspection, these temperature differences often indicate hidden structural or environmental issues — from moisture and heat loss to air leaks or poor insulation.
Applications of Thermal Imaging in Home Inspection
1. Water Leak Detection
One of the most valuable uses of infrared thermal imaging in homes is leak detection.
Leaks in pipes, roofs, or walls cause moisture buildup, which affects the surface temperature of materials. Thermal cameras can quickly identify these cooler or warmer zones, even before visible damage occurs.
Common Leak Detection Scenarios
- Roof leaks: Detect moisture penetration through insulation and roofing layers.
- Wall leaks: Identify hidden water damage caused by faulty plumbing or condensation.
- Floor heating systems: Locate pipe leaks in radiant floor systems without removing tiles or flooring.
Using a thermal imager, technicians can pinpoint the leak’s exact location, minimizing unnecessary demolition and saving repair costs.
Example:
A homeowner suspects a hidden leak behind the bathroom wall. Using a Honeytek TP175 thermal imaging camera, the inspector identifies a distinct cold area behind the tiles — confirming a leaking pipe connection.
2. Detecting Hollow or Delaminated Wall Areas (Void Inspection)
In construction, hollow spots or delaminations (known as “voids” or “debonding”) occur when wall or floor finishes separate from the underlying structure.
These air gaps change the way heat transfers through materials. With a thermal camera, such defects appear as temperature irregularities on the surface.
Why It Matters
- Detects poor workmanship before visible cracks appear.
- Prevents further deterioration or safety hazards.
- Ensures structural soundness in walls, floors, and ceilings.
Example:
During a new apartment inspection, a Honeytek TP170 detects uneven thermal patterns on a freshly painted wall, revealing several hidden air gaps beneath the plaster — allowing repairs before final handover.
3. Insulation and Air Tightness Testing
Thermal imaging plays a major role in building energy efficiency audits.
Heat loss or cold air infiltration often results from missing insulation or air leaks around windows, doors, or vents. A thermal imager clearly visualizes these areas, showing where the building envelope needs improvement.
Typical Findings
- Missing or compressed insulation in walls or roofs.
- Air leakage through poorly sealed doors or window frames.
- Cold bridging — structural elements conducting heat differently.
By identifying these weak points, homeowners can make targeted improvements to reduce energy bills and improve indoor comfort.
Example:
During a winter energy audit, an inspector uses a Honeytek TP175 camera and discovers a strong heat leak along a window frame. Resealing the joints significantly reduces heating costs.
4. Electrical and HVAC System Checks
Infrared thermal cameras can also detect overheating electrical components, faulty HVAC ducts, or uneven heat distribution in radiant systems.
- Identify loose connections in circuit breakers or outlets.
- Inspect air ducts for leaks or poor insulation.
- Verify radiant floor heating uniformity.
Regular thermal inspection ensures electrical and mechanical safety, preventing potential fire risks or system inefficiencies.
Benefits of Using a Thermal Imaging Camera for Home Maintenance
| Benefit | Description |
|---|---|
| Non-Destructive Testing | Detect problems without drilling, cutting, or dismantling structures. |
| Time Efficiency | Scan large areas quickly and identify multiple issues at once. |
| Early Problem Detection | Spot leaks or insulation gaps before they cause visible damage. |
| Cost Savings | Targeted repairs reduce unnecessary material and labor costs. |
| Data Recording | Save and compare thermal images for future maintenance documentation. |
With these advantages, infrared thermal imaging has become a standard practice in modern home inspection and preventive maintenance.
How to Use a Thermal Imaging Camera for Home Inspection
Step 1: Calibrate and Prepare the Device
Before inspection, ensure your thermal camera is calibrated. Adjust emissivity and temperature settings based on building materials (most walls and ceilings have emissivity values between 0.90–0.95).
Step 2: Choose the Right Conditions
For best results, perform inspections when there’s a temperature difference between indoor and outdoor environments (at least 10°C). Early morning or late evening is ideal.
Step 3: Scan the Area
Slowly move the camera across walls, ceilings, and floors. Observe the thermal patterns — cooler or warmer zones may indicate potential issues.
Step 4: Capture and Analyze Images
Take photos or videos of suspicious areas. Use the camera’s software to measure temperature differences and mark problem spots.
Step 5: Plan Repairs
Share the thermal data with contractors or maintenance teams for targeted repairs. Keep records for future reference or resale inspections.
Recommended Thermal Imaging Cameras for Home Inspection
1. Honeytek TP170 / TP175 Mobile Plug-in Thermal Imaging Cameras
Designed for home inspectors, contractors, and DIY users, the Honeytek TP series offers excellent performance at a competitive price.
- Resolution: 160×120 (TP170), 256×192 (TP175)
- Temperature Range: -20°C to 400°C
- Features: Compact smartphone plug-in design, real-time imaging, precise temperature measurement
- Advantages: High clarity, fast response, and excellent value for money
Honeytek thermal imagers make professional-level home diagnostics affordable and portable — ideal for both commercial and residential use.
2. FLIR C5 / One Pro
A professional choice with cloud connectivity and high dynamic range, but at a higher cost. Ideal for certified inspectors who perform frequent, detailed surveys.
3. Topdon TC001
Another cost-effective option for general home maintenance, suitable for detecting insulation or leak issues.
Practical Tips for Accurate Thermal Inspection
- Avoid sunlight exposure: Direct sunlight can mask real temperature differences.
- Use consistent scanning distance: Keep the same distance for comparable results.
- Allow the building to stabilize: Ensure heating or cooling systems run long enough to reveal thermal contrast.
- Combine thermal and visual images: Most Honeytek models overlay both for better interpretation.
- Save reports: Documenting thermal findings helps monitor long-term improvements.
Frequently Asked Questions (FAQ)
Q1: Can thermal cameras detect water inside walls?
Yes. Moisture changes the surface temperature, which appears as a cold or dark patch on a thermal image. Thermal imagers help locate the exact area for minimal repair work.
Q2: Do I need professional training to use a thermal camera?
Basic thermal inspection is simple and intuitive. Devices like the Honeytek TP175 are plug-and-play, with user-friendly apps for automatic analysis.
Q3: Can I use a thermal imager in daylight?
Yes, but avoid direct sunlight, as it can cause misleading readings. Indoor or shaded inspections give more accurate results.
Q4: What temperature difference is needed for effective inspection?
A difference of at least 10°C between indoor and outdoor temperatures helps highlight insulation or air leakage issues clearly.
Q5: Are Honeytek thermal imagers suitable for professional use?
Absolutely. Honeytek’s thermal cameras combine professional-grade accuracy with affordable pricing, making them ideal for both certified inspectors and maintenance teams.
Conclusion: The Future of Smarter Home Maintenance
Infrared thermal imaging has revolutionized home inspection and maintenance. From detecting hidden water leaks and hollow walls to analyzing insulation and air tightness, thermal imagers deliver fast, reliable, and non-destructive diagnostics.
For professionals and homeowners alike, investing in a thermal imager means gaining clarity, confidence, and long-term savings. And with brands like Honeytek, you no longer need to choose between accuracy and affordability.
Ready to make your home inspections faster, smarter, and more accurate?
Explore Honeytek’s TP170 and TP175 Mobile Thermal Imaging Cameras — compact, precise, and designed for real-world maintenance applications.
