
Measuring leakage current with a clamp meter is one of the fastest ways to confirm whether a circuit is “clean” or quietly bleeding current to ground. The catch is that leakage can be tiny (mA level) or, in fault conditions, unexpectedly large. That is why the right range and mode selection matters as much as the clamping technique.
The field-proven principle is simple: start high, confirm safety, then step down for precision.
What You’re Actually Measuring When You “Measure Leakage”
In a healthy AC system, current leaving on the live conductor should return on the neutral conductor. If you clamp live + neutral together, those currents cancel out. Any remaining current is the residual (unbalanced) current, typically caused by:
- insulation degradation
- moisture ingress
- filter capacitors in electronic equipment (small “normal” leakage)
- damaged cables, crushed insulation, or wiring errors
- appliance faults or ground faults
Key point: for leakage testing with a clamp meter, you’re usually measuring AC residual current, not the load current.
Step 1: Choose the Correct Mode First (This Prevents Wrong Readings)
Use AC Current Mode (A~ / ACA) — not DC
Leakage on typical power systems is assessed as AC residual current, so you must select AC current (A~).
Do not use DC current mode (A⎓ / DCA) for standard AC leakage testing—doing so can produce misleading or completely incorrect values.
If your meter has a dedicated Leakage (mA) function, use it
Some clamp meters include a leakage current range (often labeled in mA, e.g., 0–60 mA / 0–200 mA / 0–600 mA) with finer resolution like 0.01 mA or 0.1 mA. For leakage work, this is the most practical and accurate option.
Step 2: Range Selection Workflow (The Safe, Professional Method)
Why “start high” matters
If there is a serious fault (or a wiring mistake), residual current can be larger than expected. Starting on a low mA range can lead to overload, unstable readings, or misinterpretation.
A safe workflow looks like this:
Step A — Start on the highest AC current range (Safety check)
- Set the meter to AC current at the maximum range (for example, 600 A or 1000 A).
- Clamp Live + Neutral together (or all phase conductors + Neutral in three-phase systems).
Goal: confirm there is no unexpected high residual current indicating a severe fault condition or a major wiring issue.
- If the reading is large, stop and investigate the root cause before proceeding.
- If the reading is small and stable, move to a lower range.
Step B — Move to a mid-range (Transition stage)
Switch to a mid-range such as 200 A or 20 A (depending on your meter’s ranges).
This step helps you:
- confirm the residual current remains low and stable
- avoid jumping straight from high amps to mA on noisy sites
- spot cases where the “leakage” is actually a significant imbalance
If the residual current begins to show amps, you likely have a major fault or incorrect clamping method (e.g., clamping a single conductor instead of the pair).
Step C — Use the mA range for the real measurement (Precision stage)
Now switch to:
- 200 mA / 600 mA range, or
- the meter’s dedicated leakage mA function (preferred)
Wait for the reading to stabilize, then record the value.
Practical interpretation guide (mA):
| Leakage Current (mA) | Typical Meaning | Suggested Action |
|---|---|---|
| < 1 mA | Generally normal (depends on cable length, filters) | Log and move on |
| 1–5 mA | Usually acceptable | Monitor trends |
| 5–30 mA | Elevated leakage risk | Start circuit-by-circuit isolation |
| > 30 mA | Serious leakage / trip risk | De-energize and repair ASAP |
Note: acceptable thresholds vary by standards, environment, circuit length, and installed equipment. Use this table as a field triage guide, not a legal compliance limit.
How to Clamp Correctly (The “Residual Current” Technique)
Single-phase circuits
- Clamp Live + Neutral together
- A near-zero reading means balanced current
- Any non-zero stable reading indicates residual/leakage current
Three-phase circuits
- Clamp L1 + L2 + L3 + N together if possible
- If the reading is high, split the test:
- clamp per branch feeder, or
- clamp phase/neutral combinations depending on site wiring practices
This helps locate which circuit contributes most to the leakage.
Accuracy Tips for mA-Level Leakage Readings
Use ZERO/REL if available
For very small readings, ambient electromagnetic fields and meter drift can matter.
Best practice:
- clamp in the air away from conductors
- press ZERO/REL to null the offset
- clamp the conductors and measure again
This improves repeatability on low mA ranges.
If your clamp meter has no mA range
You can still do a rough check using the smallest A~ range (e.g., 2 A or 20 A), but:
- resolution is typically too coarse for reliable leakage quantification
- it becomes a “presence/absence” check rather than a true leakage measurement
If leakage testing is a regular task, a meter with a dedicated mA range is worth it.
Field Safety and Workflow Notes
- Clamp first, then adjust range when possible. Avoid fumbling around energized conductors.
- Step down ranges only when the reading is clearly below the current range limit (a conservative rule: below ~10% of full scale).
- Take 3–5 readings and use the average if the site has switching loads or intermittent equipment cycling.
- If readings jump when motors start or equipment switches, consider MIN/MAX capture if your meter supports it.
Quick Memory Rule (For On-Site Work)
Leakage test = AC mode → highest range for safety → mid-range → mA range for precision → clamp Live + Neutral together.
Choose a Clamp Meter Built for Real Leakage Work
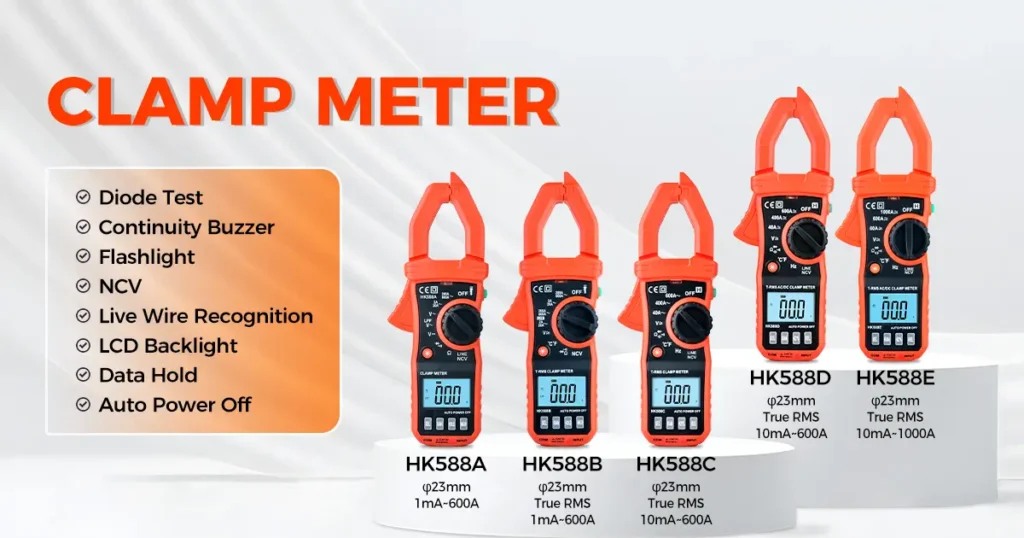
If you routinely troubleshoot nuisance tripping, insulation issues, or equipment leakage in commercial and industrial environments, a clamp meter with True RMS, stable low-range performance, and a dedicated mA leakage function can significantly improve both accuracy and efficiency.
Honeytek is a manufacturer of digital clamp meters and digital multimeters, supporting OEM/ODM projects for distributors and professional tool brands—custom labeling, packaging, and feature configurations included.
You may can like:
- Why Handheld Capacitance Meters Struggle With Small-Capacitor Measurements
- AC-Only vs. AC/DC Clamp Meters: Choosing the Right Tool for Your Electrical Applications
- How to Measure DC Current in a Photovoltaic (PV) System Using Clamp Meter
- Key Specifications for Choosing an Industrial High-Current Clamp Meter
